Fashion City - Shopify  Responsive Sectioned Theme

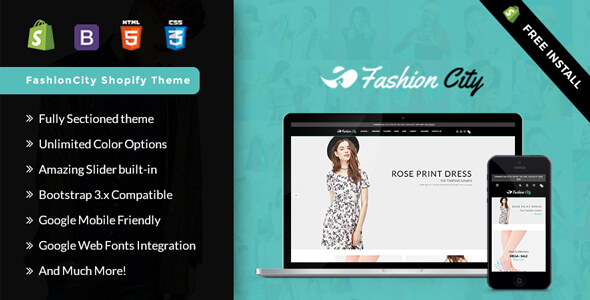
Boost your sales with Fashion City -Shopify Responsive Sectioned Theme : Fashion City is a clean, elegant fully responsive and highly customisable shopify theme – perfect for selling clothing, women fashion, fashion, accessories, high fashion, men fashion, jewelries, digital, glasses, kids, shoes, watches, bags.

Stay on top of your sales with fashion city. Best secioned theme with full of features

Get the best Support by certified Shopify developers. https://experts.shopify.com/it-geeks The theme comes with best support doc for the installation, customisation and theme management that you can manage yourself without any coding knowledge. Even if you need any further support that you can’t manage yourself feel free to raise a support ticket or send us an email : support@itgeeksin.com we will get back to you within 12 hours time.

Packages

After purchased our theme, you need to go your download area, click on button Download and select download All files & documentation. Once the download is complete, unzip the file and you would see the following packages:

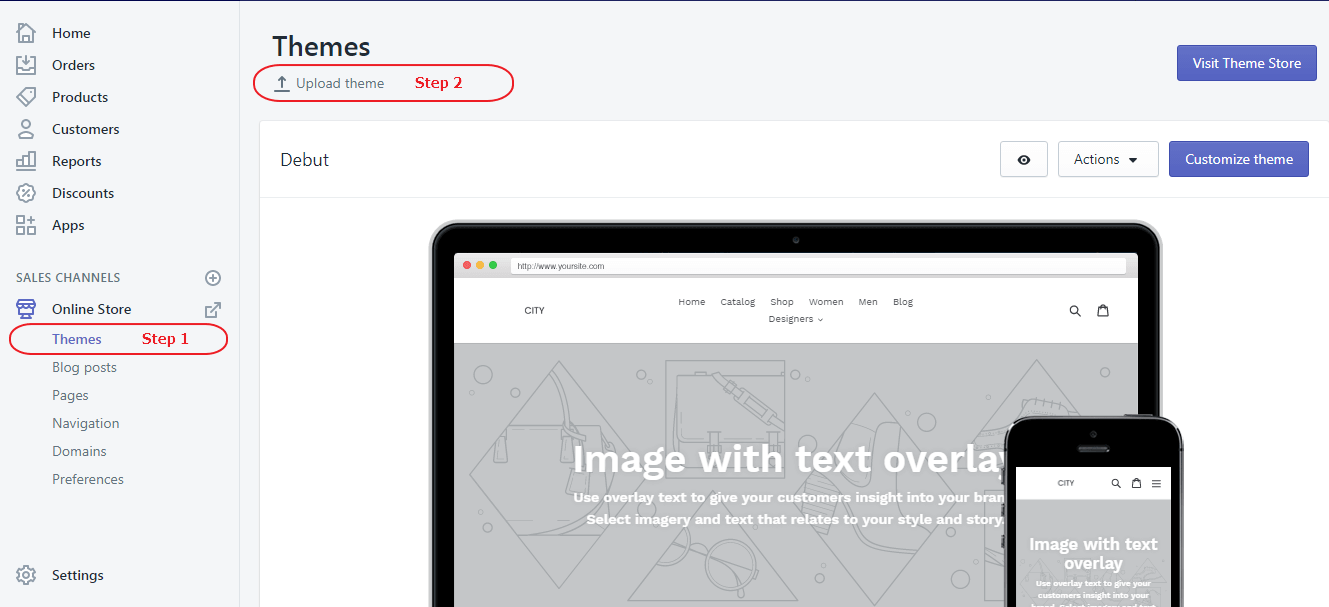
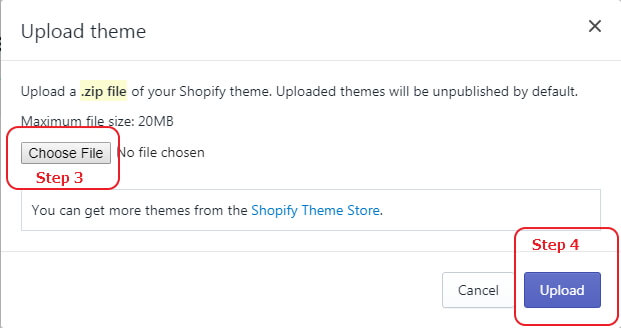
To install the theme, log in to your Shopify store and go to the Themes. From there, click on Upload a Theme and upload the .zip file from the ‘upload’ folder included with this package.
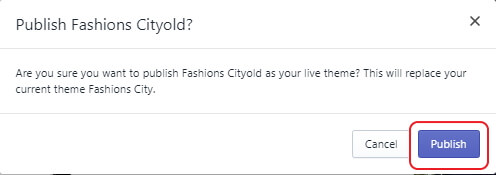
If your store is currently live and using a different theme, you select button Publish theme what you have just upload.

Set Product Review

To enable product review, please install below app:

Get App - Product Reviews

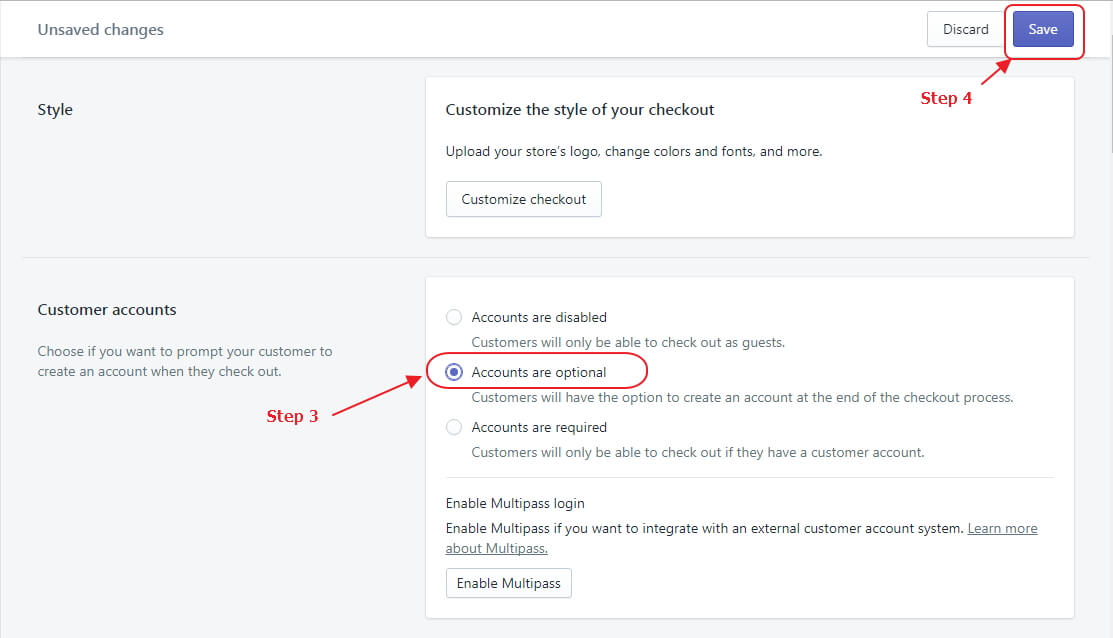
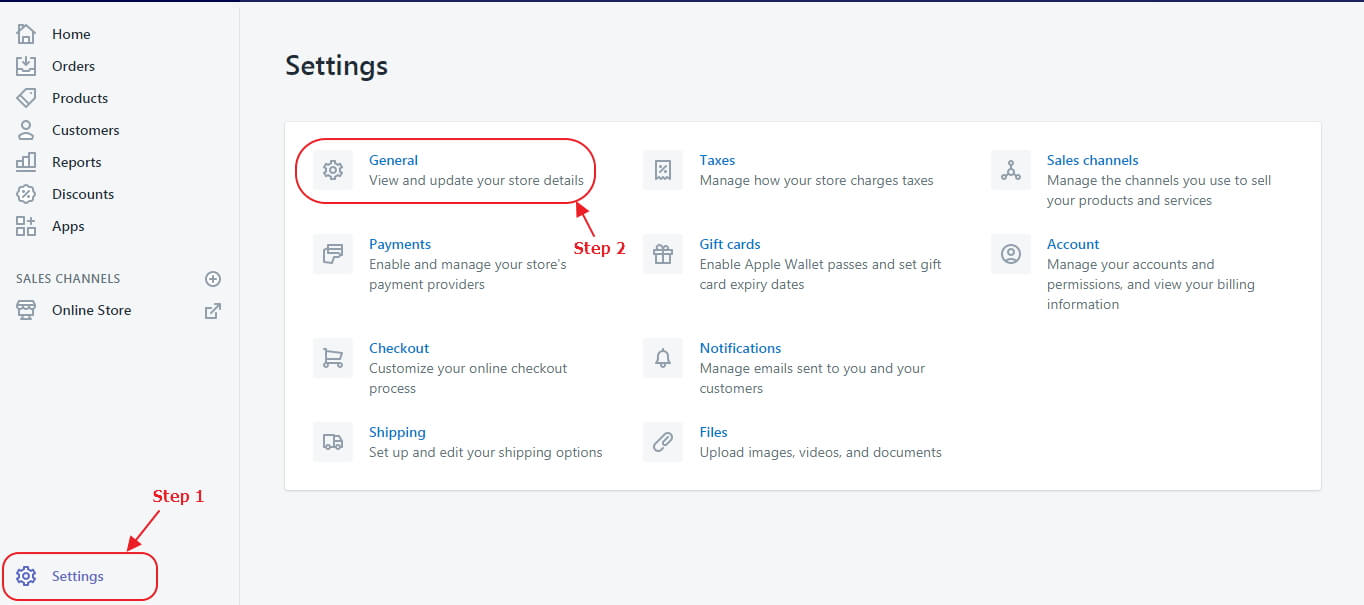
Enable Customer Registration Form

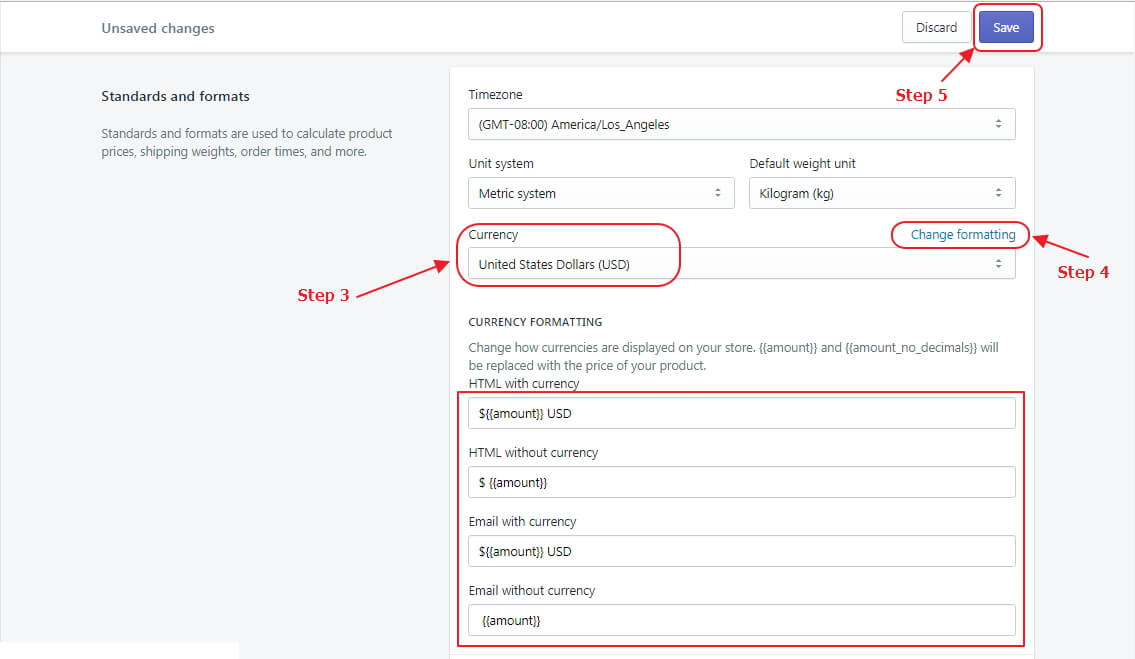
Currency Setting

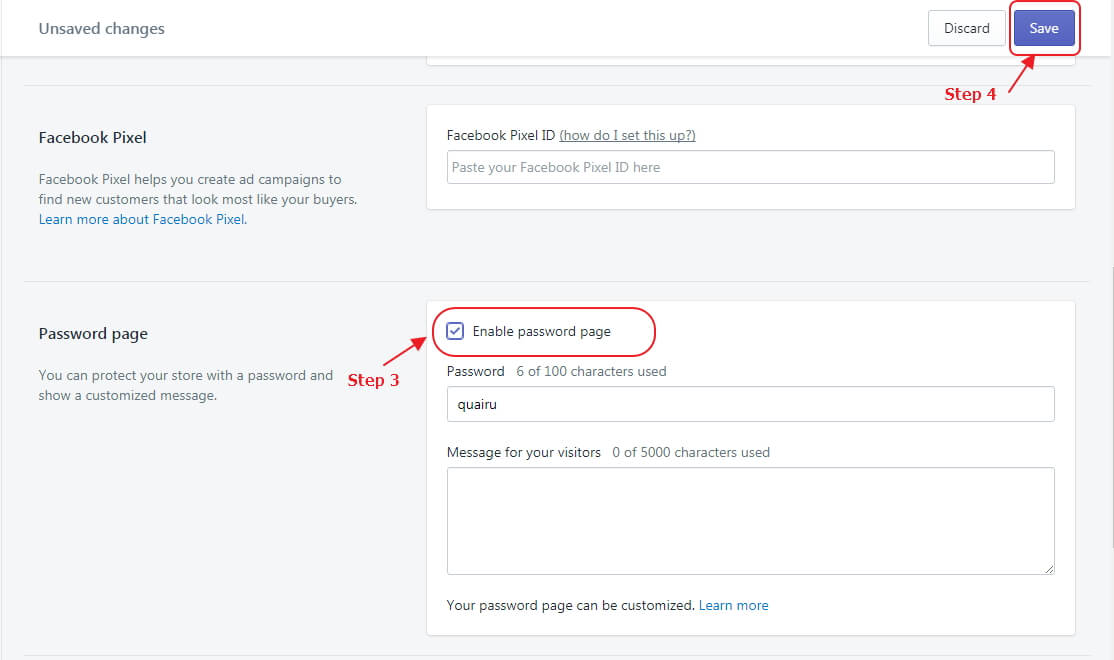
Enable Store

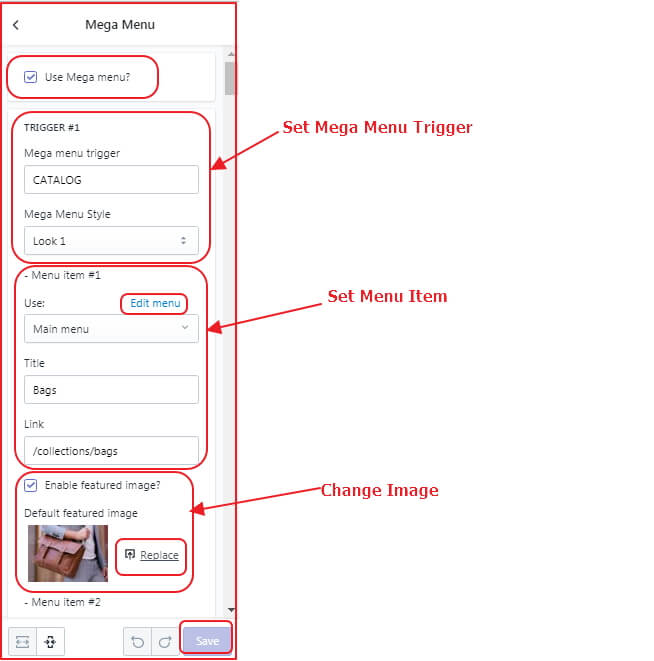
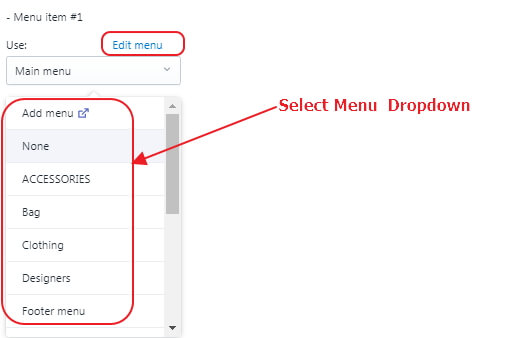
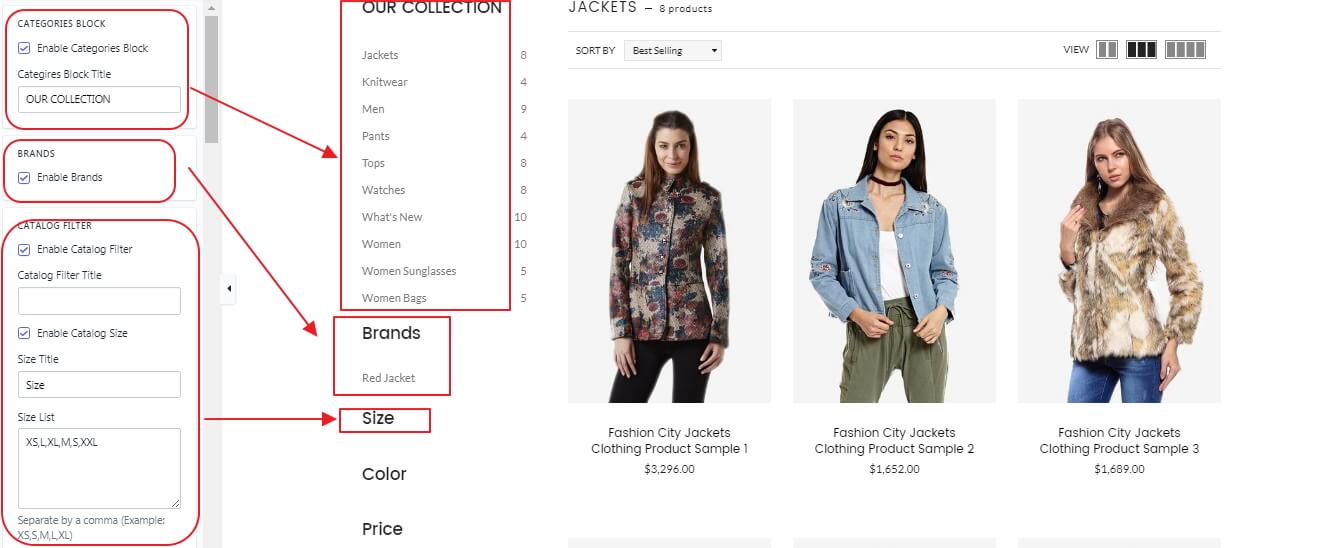
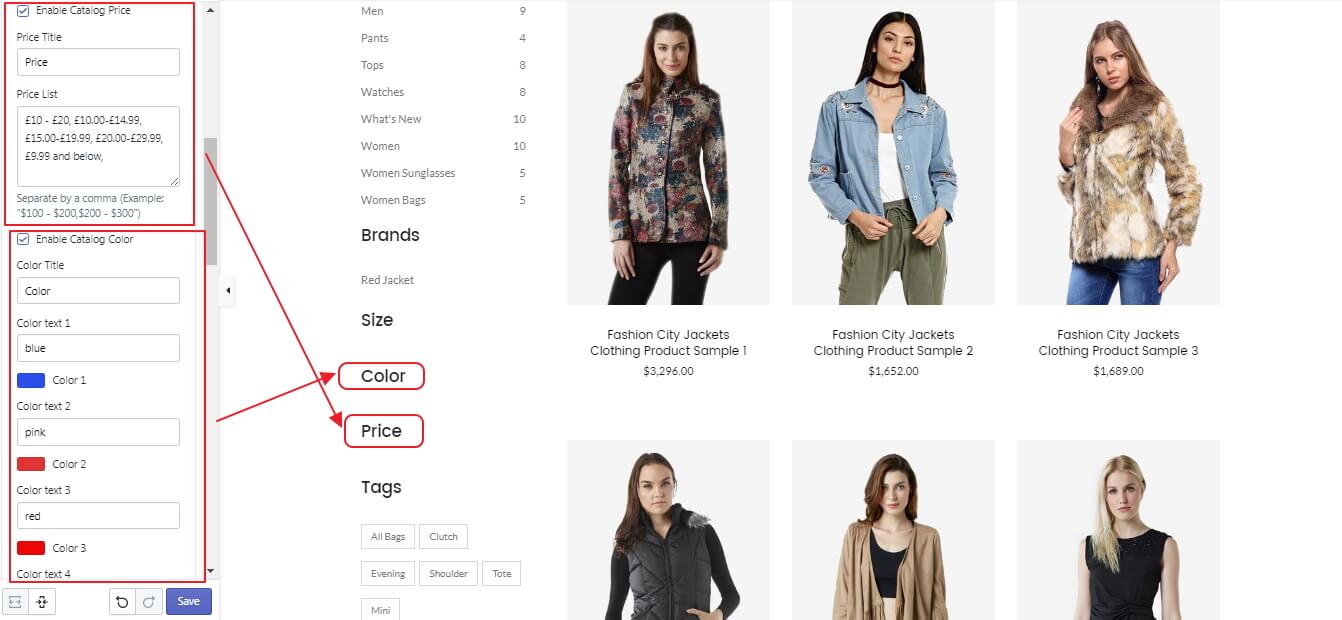
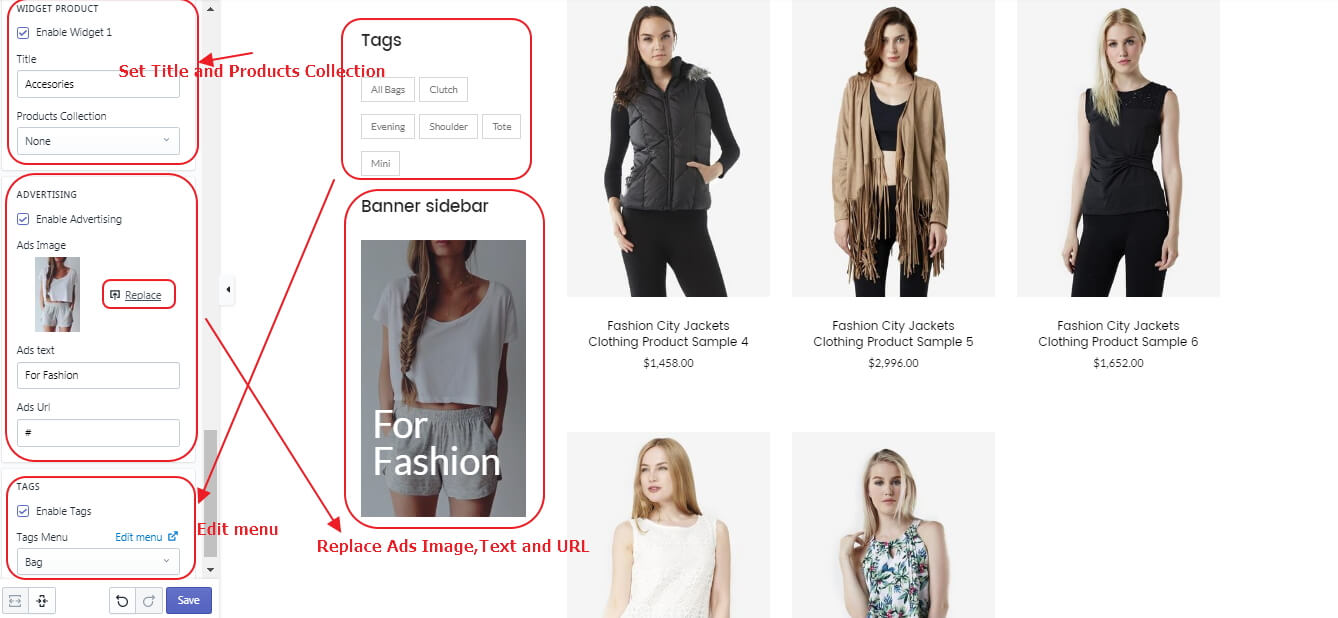
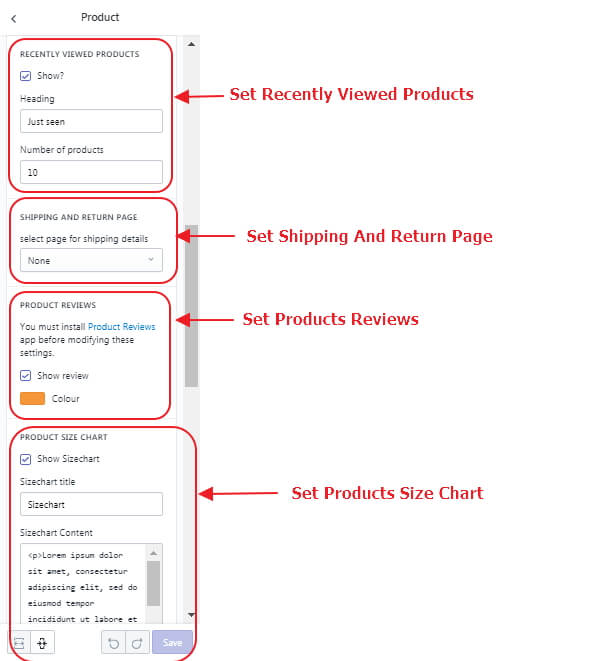
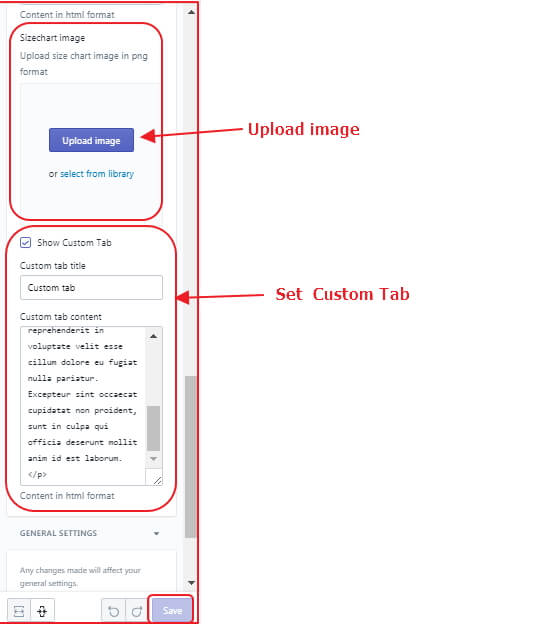
Now you can customize below
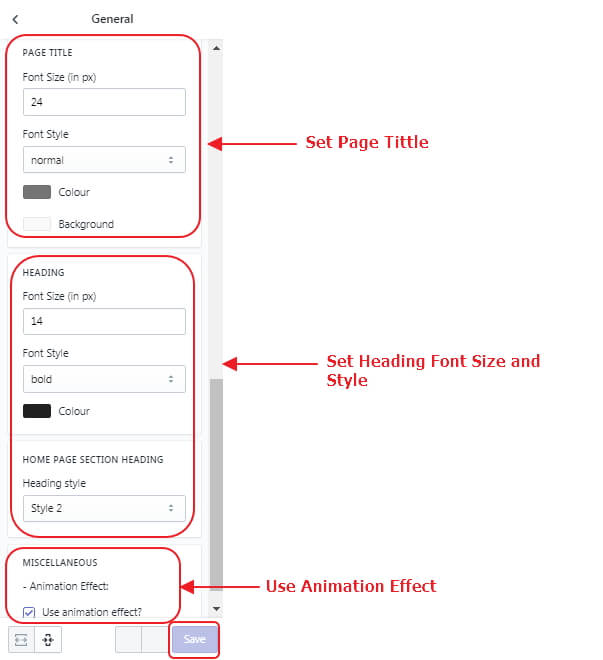
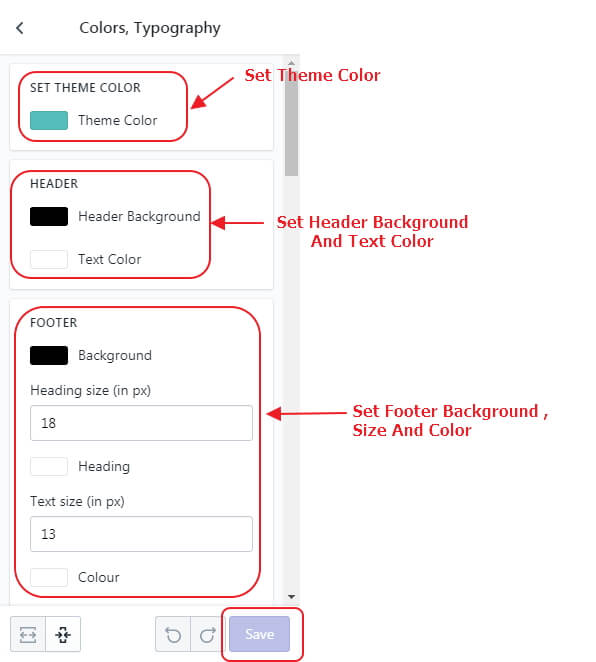
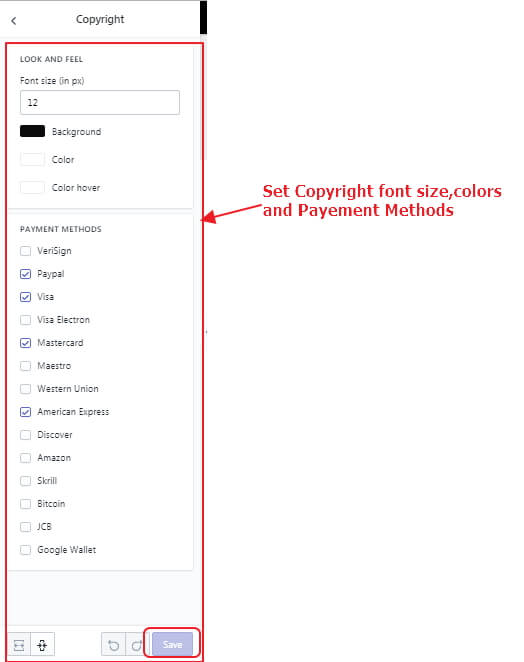
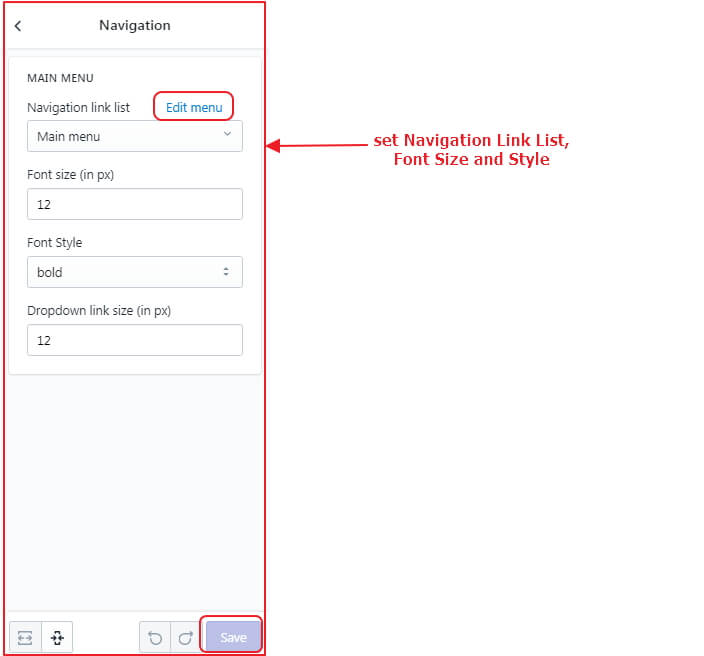
  • 1 Set the theme color,Header background,Text color And Footer background,text color and Font Size.

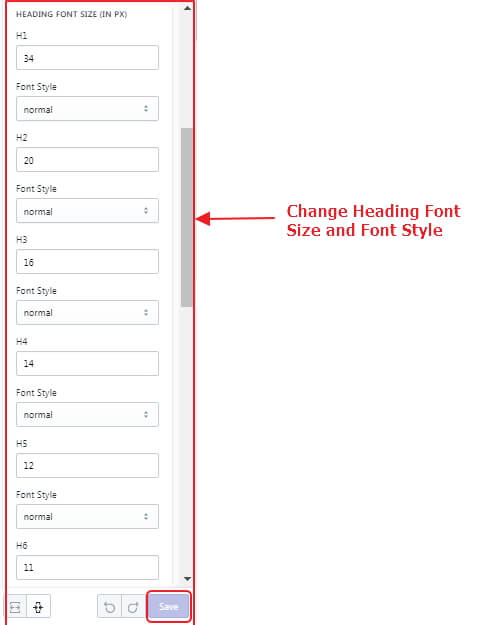
  • 2 Set Heading Font Size and Font Style.

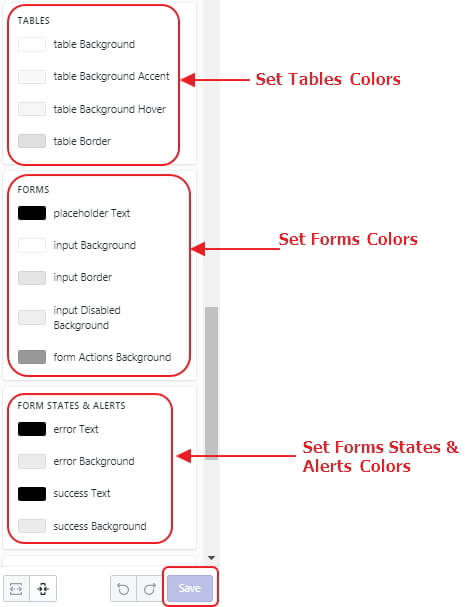
  • 3 Set Tables Colors,Forms Colors and Forms States & Alerts Colors.

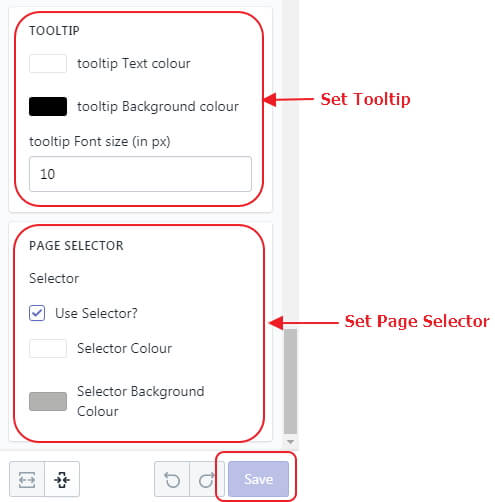
  • 4 Set Tooltip and Page Selector.
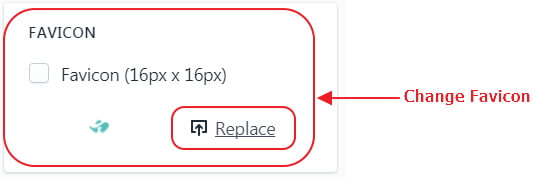
  • 1 Change Favicon Icon.

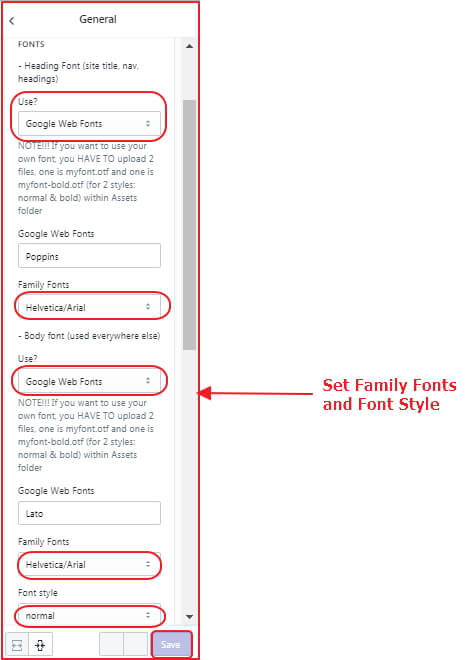
  • 2 Set Fonts Family (Default: Poppins , Lato).

  • 3 Set Heading Style and Fonts.
  • 1Settings For MailChimp Popup.

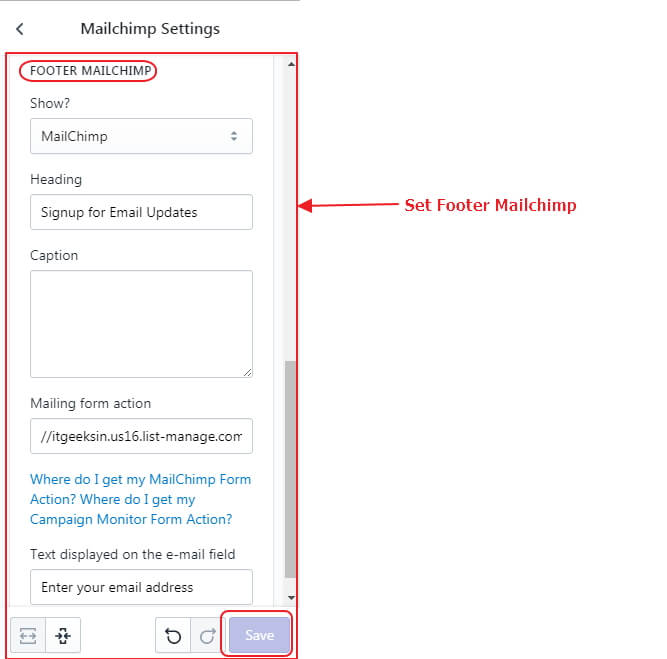
  • 2Settings For Footer MailChimp .
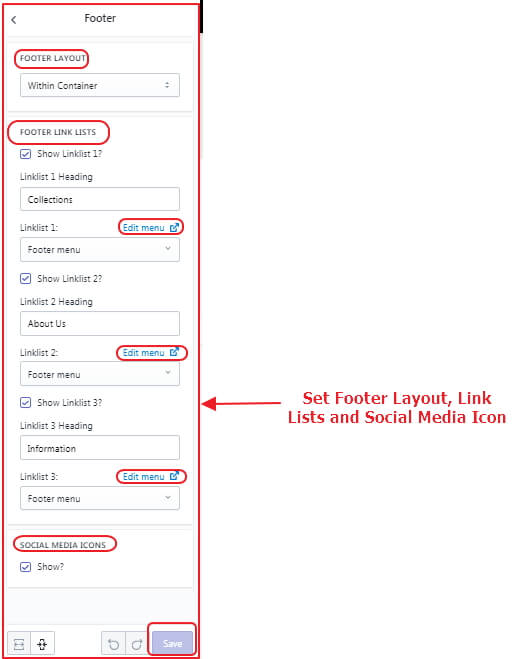
  • 1Set Social Media Icons.

  • 2Set Social Sharing checkbox.

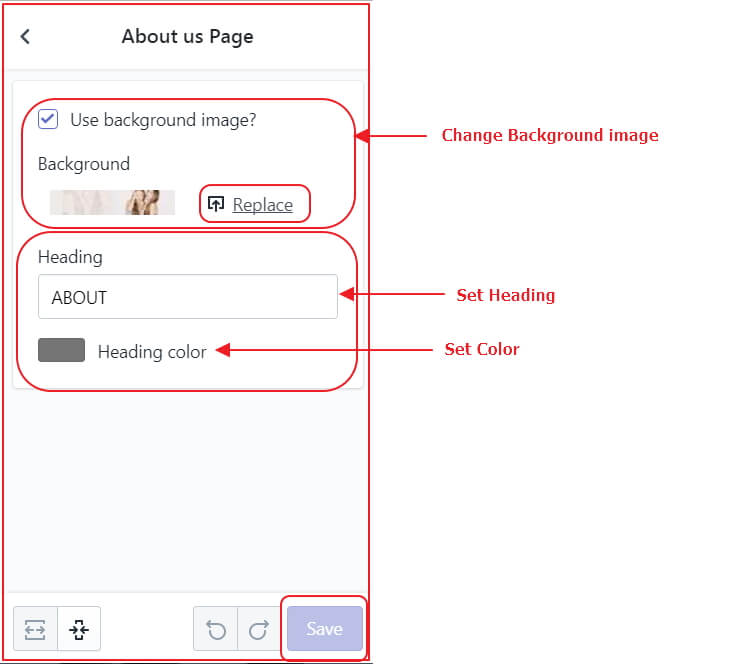
Now you can customize below
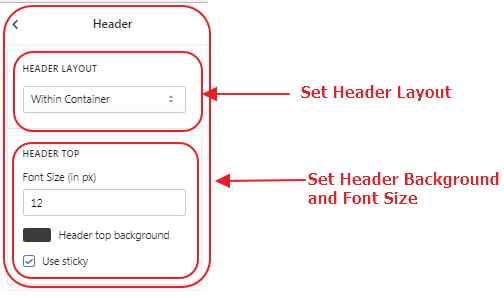
  • 1Change Background image,Heading text and Color.
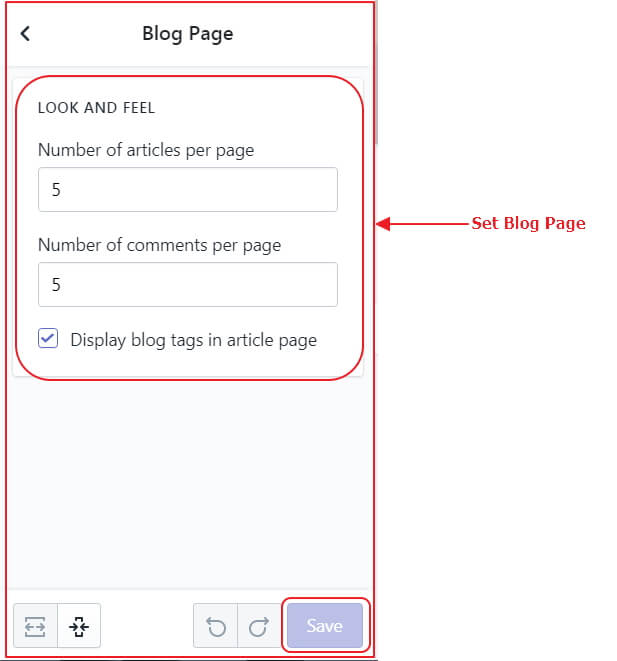
  • 2Set Blog Page.

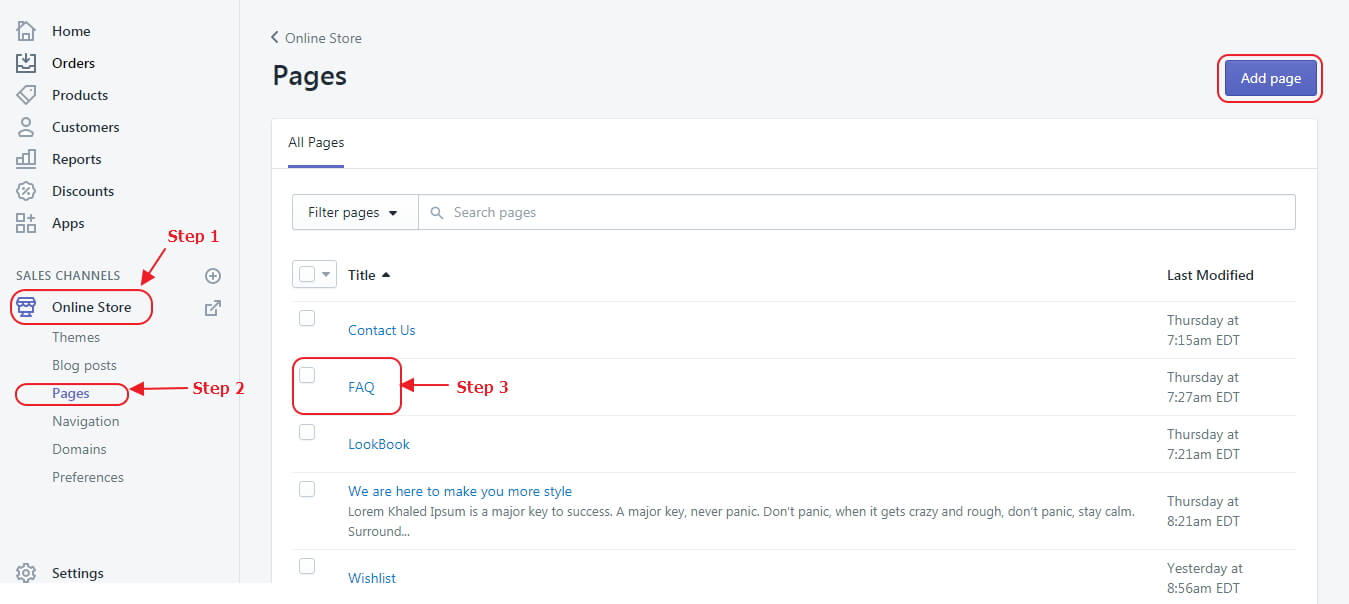
  • 1On left side click to Online Store Menu.
  • 2Dropdown menu will show, click to Pages Menu.
  • 3Click to FAQs Button.

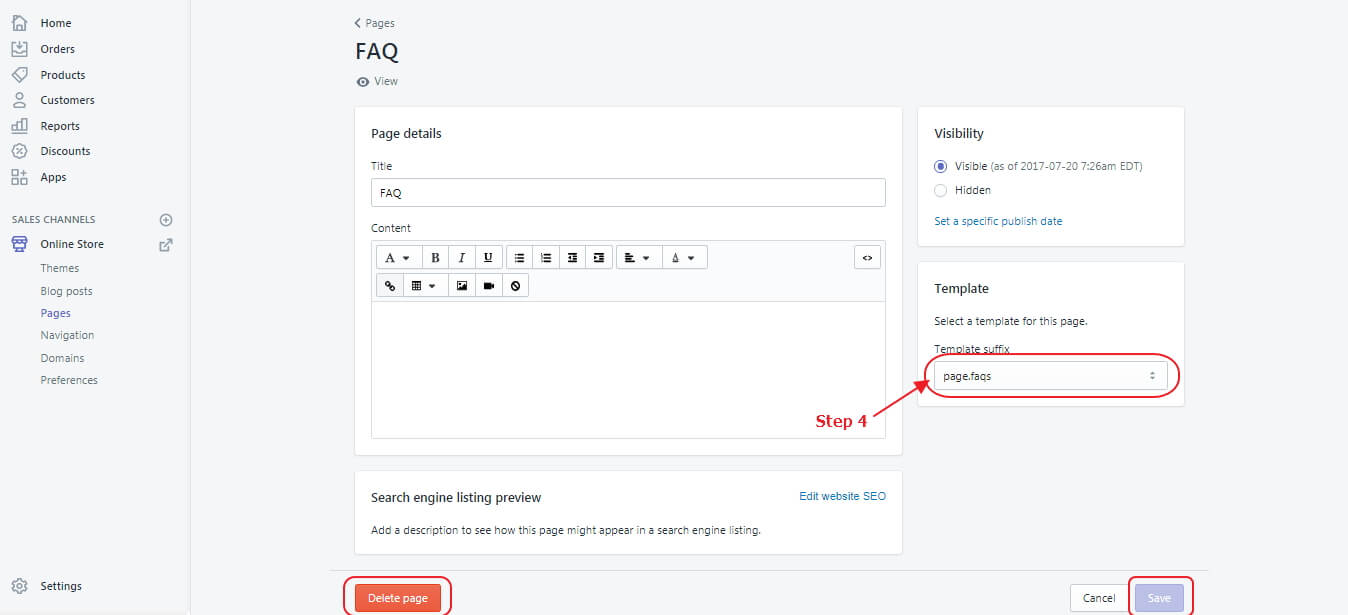
  • 4Select Dropdown page.faqs on Right side.
  • 1On left side click to Online Store Menu.
  • 2Dropdown menu will show, click to Themes Menu.
  • 3Click to Customize Theme Button.
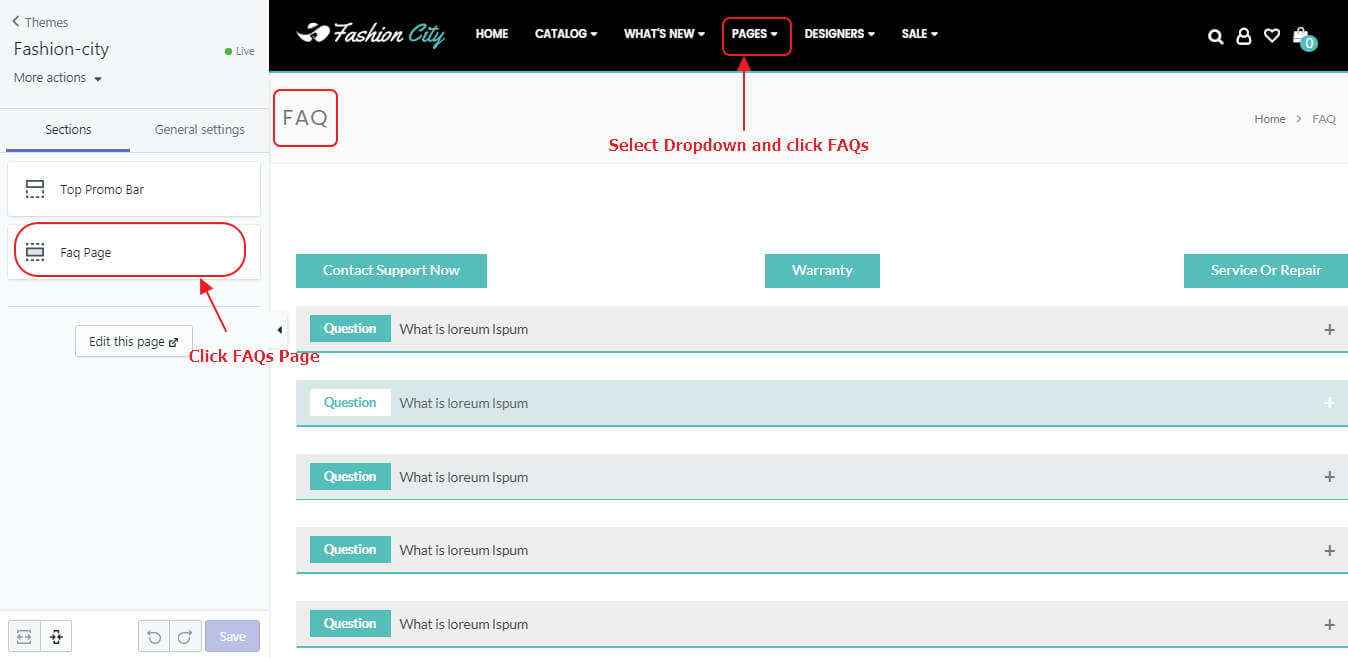
  • 4On right side click to Pages Menu.
  • 5Dropdown menu will show, click to FAQs Menu.
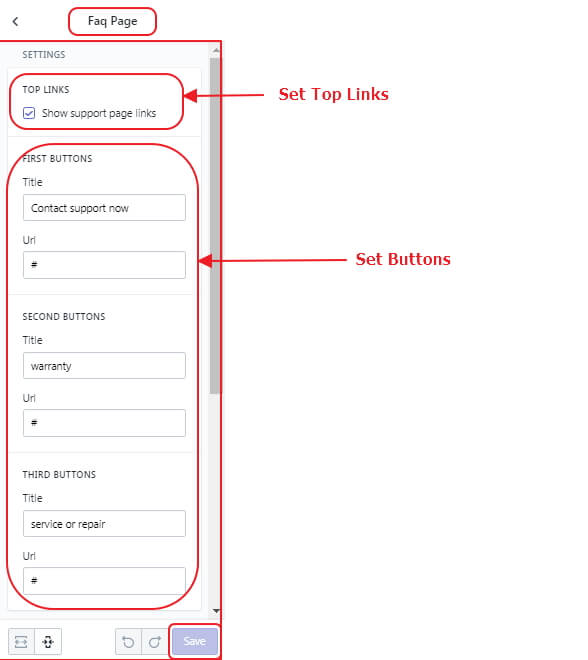
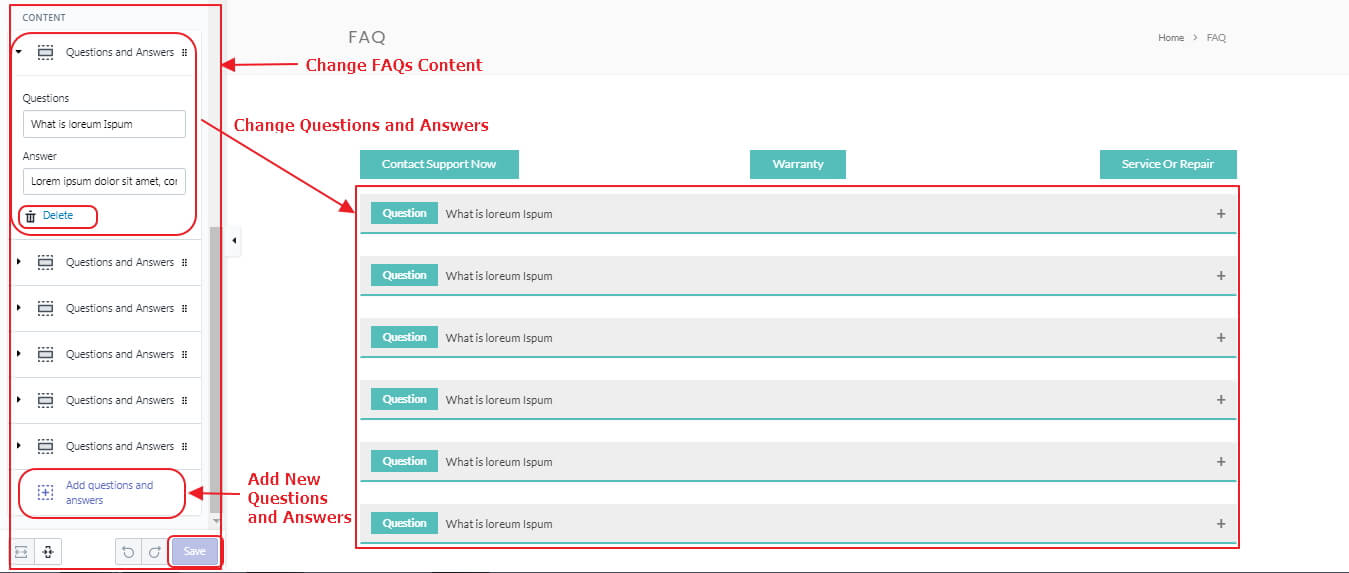
  • 6on left side show Sections click to >> FAQs page.

Now you can customize below
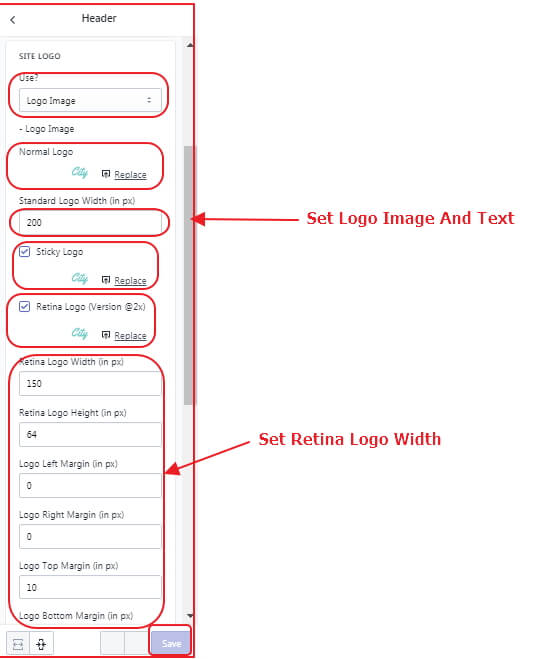

  • 4Set Top Links and Buttons.

  • 5Change and Add New Questions and Answers.

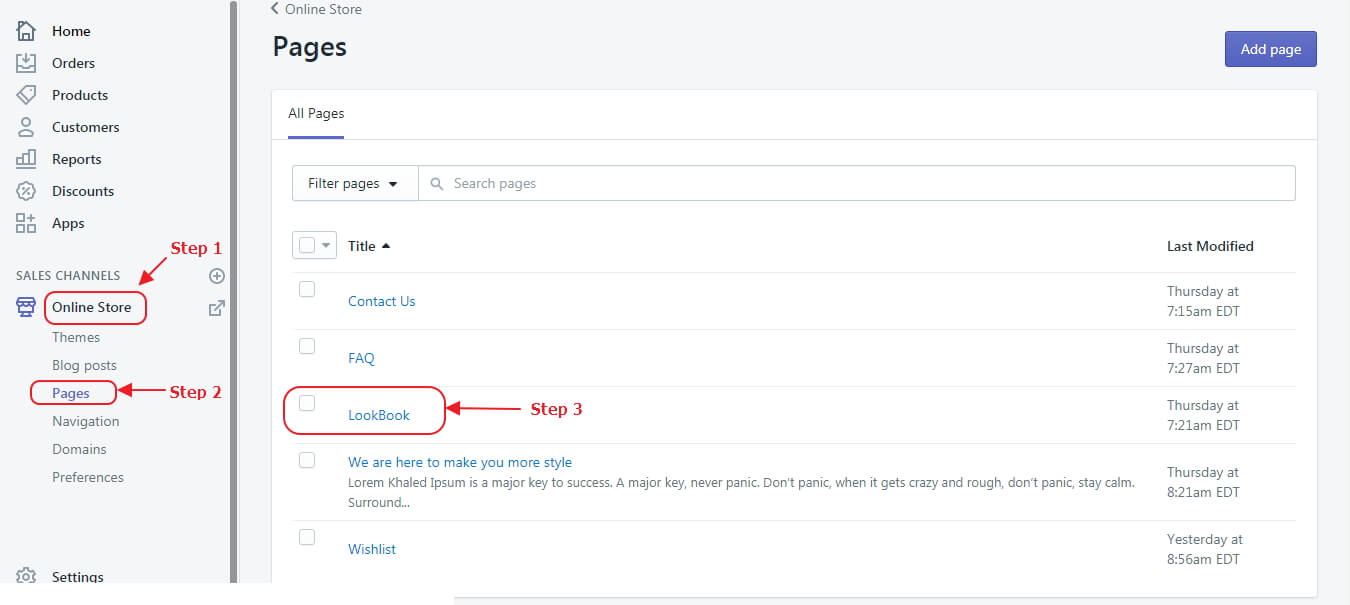
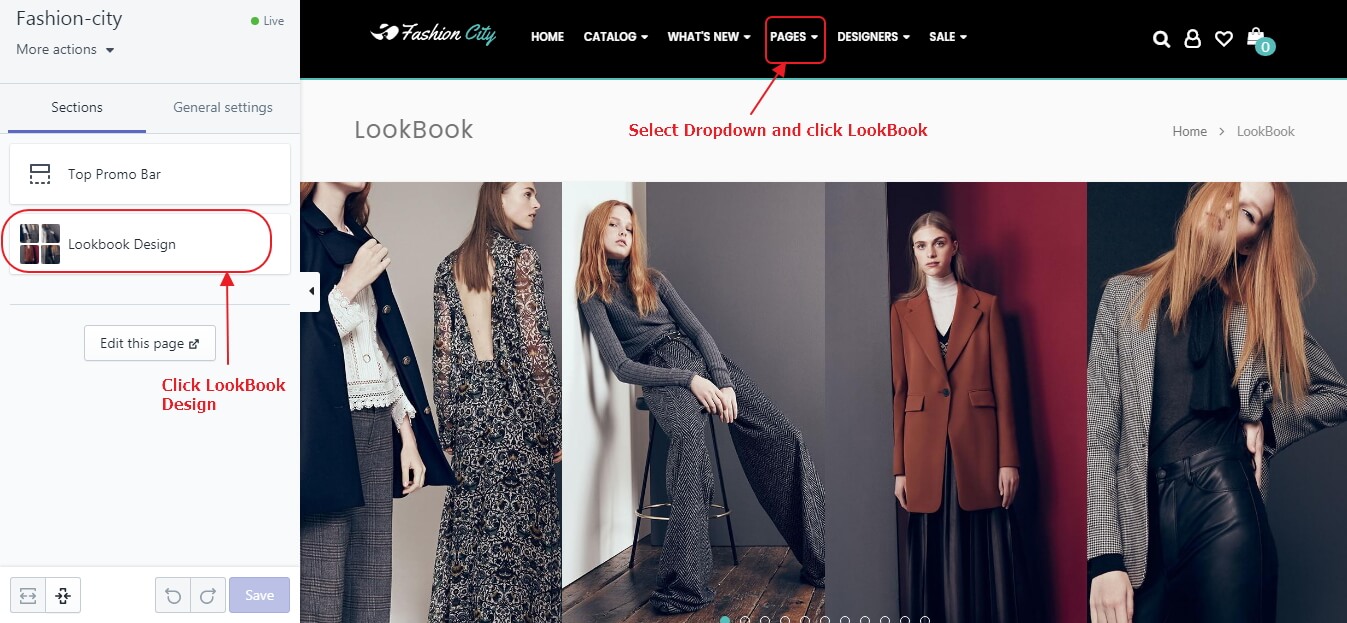
  • 1On left side click to Online Store Menu.
  • 2Dropdown menu will show, click to Pages Menu.
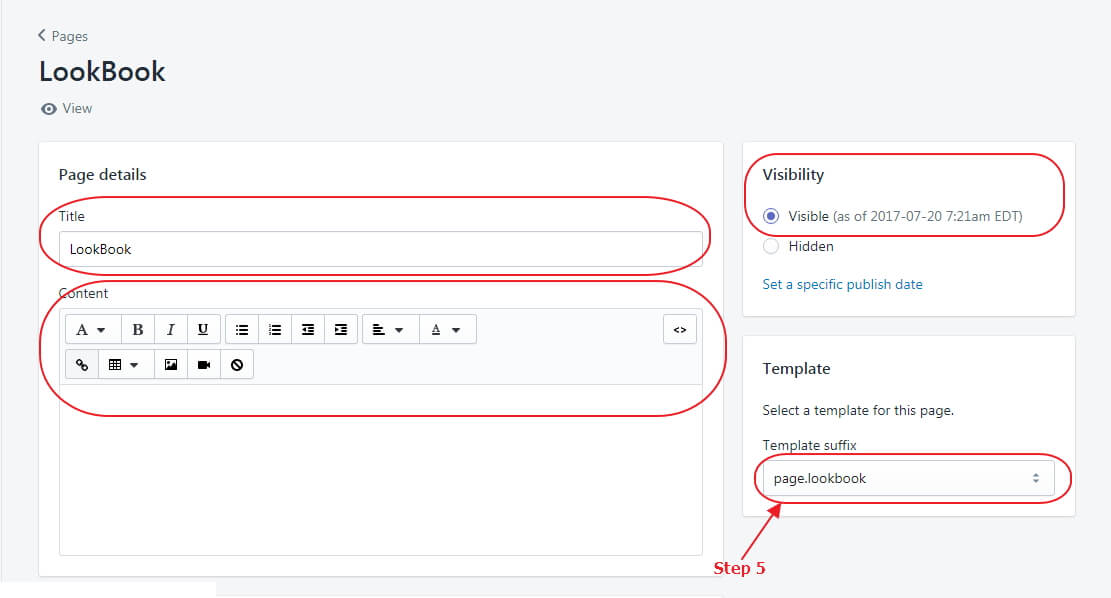
  • 3Click to LookBook Button.

  • 4Select Dropdown page.lookbook on Right side.
  • 1On left side click to Online Store Menu.
  • 2Dropdown menu will show, click to Themes Menu.
  • 3Click to Customize Theme Button.
  • 4On right side click to Pages Menu.
  • 5Dropdown menu will show, click to LookBook Menu.
  • 6on left side show Sections click to >> LookBook Design.

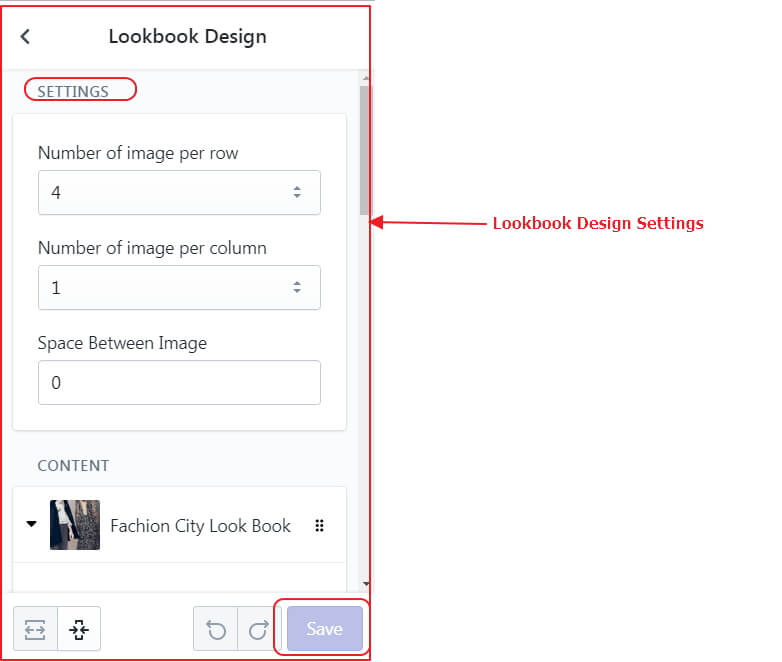
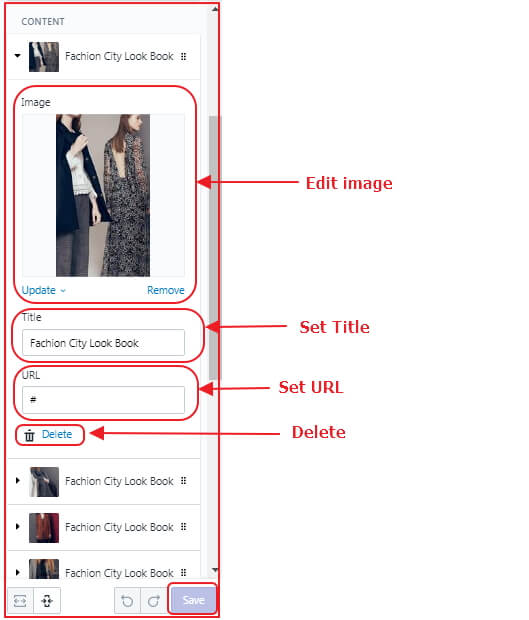
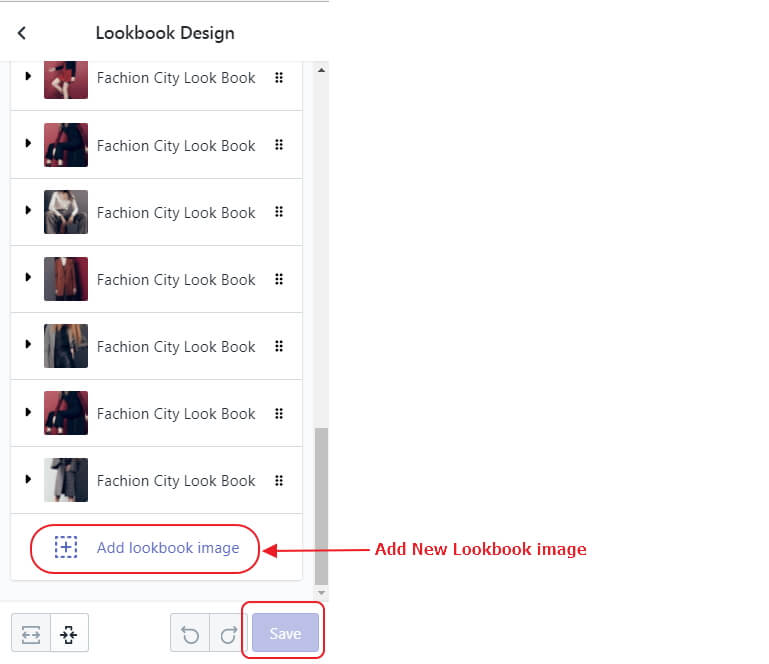
Now you can customize below
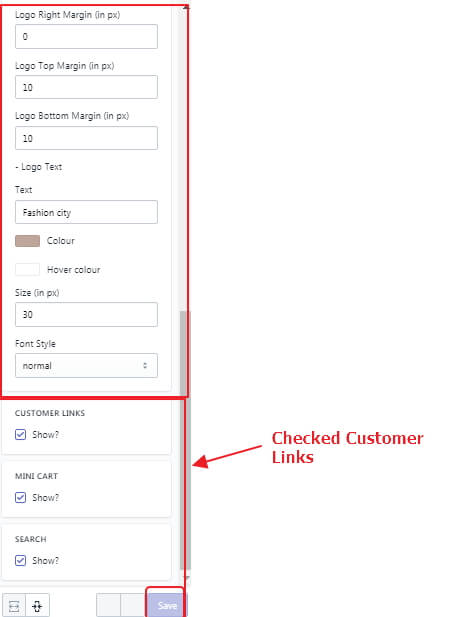

  • 4Set Lookbook Settings.

  • 5Edit image,Set Title,URL and Delete.

  • 6Add New Lookbook image.

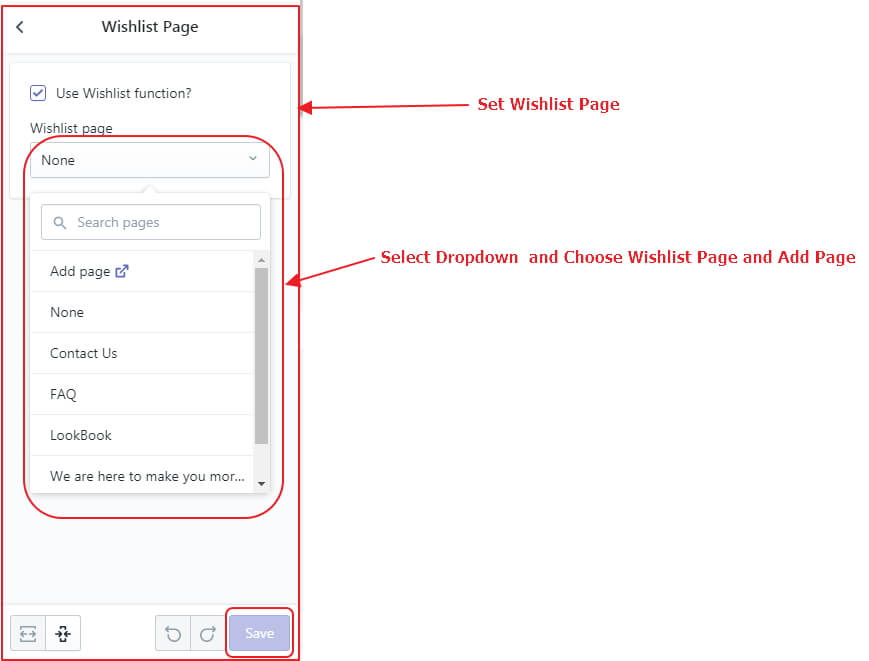
  • 5Set Wishlist Page.
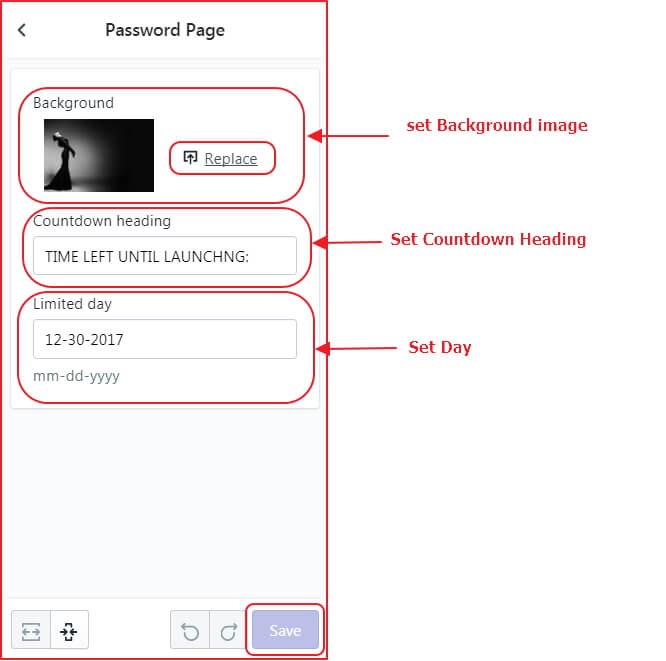
  • 6Set set Background image,Countdown Heading and Day.
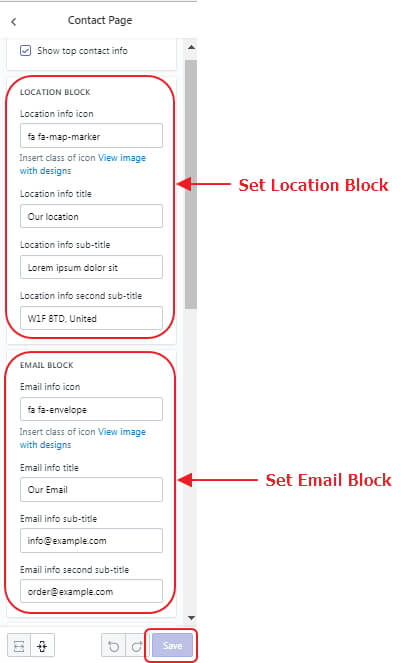
  • 1Set Location and Email Block.

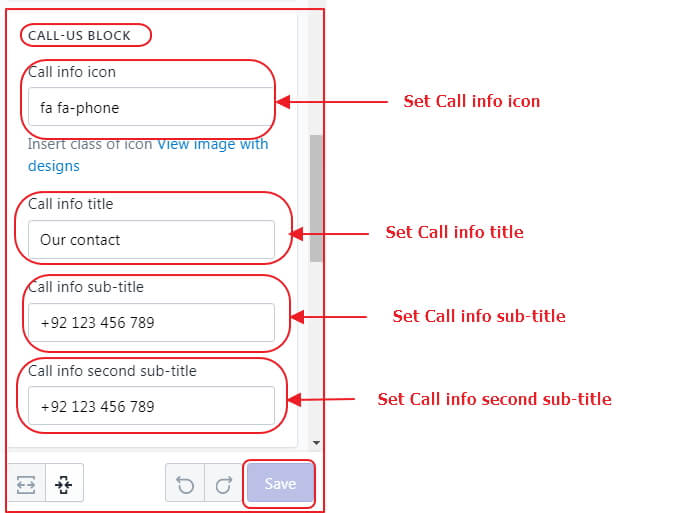
  • 2Set CAll-Us Block.

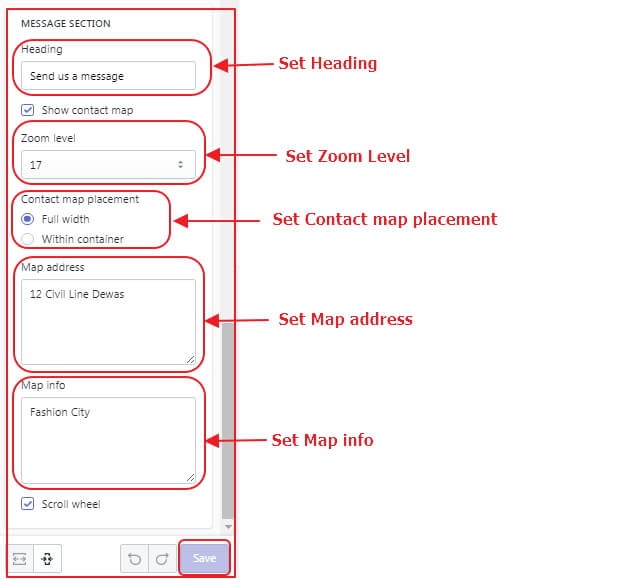
  • 3Set Message Section.
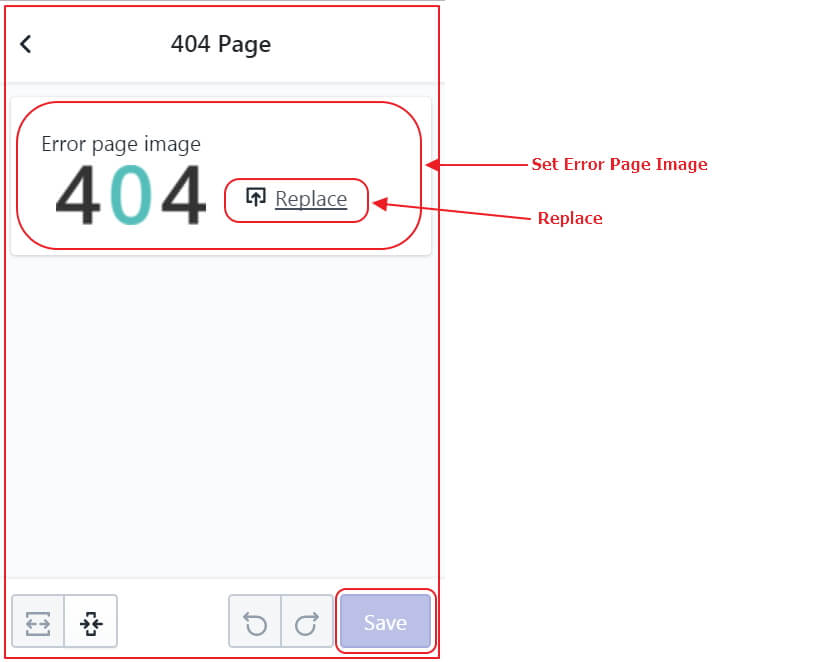
  • 8Set Error Page Image.

Now you can customize below
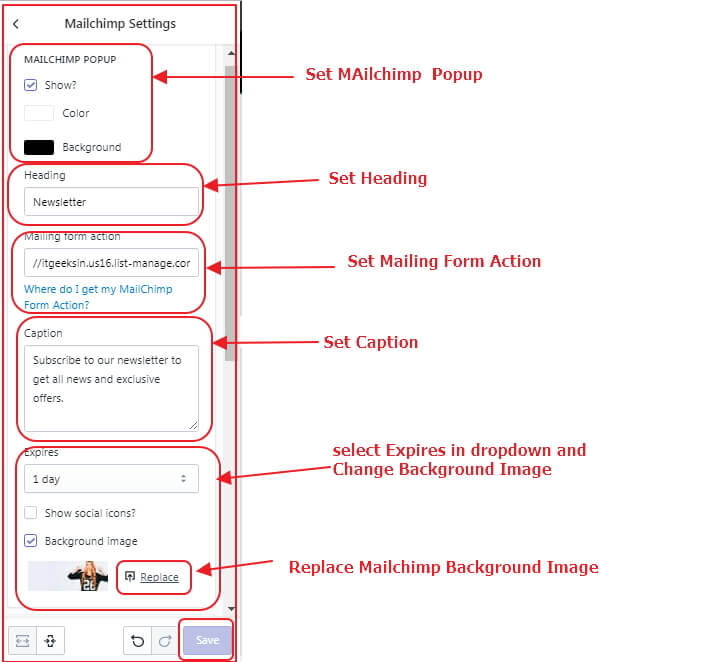

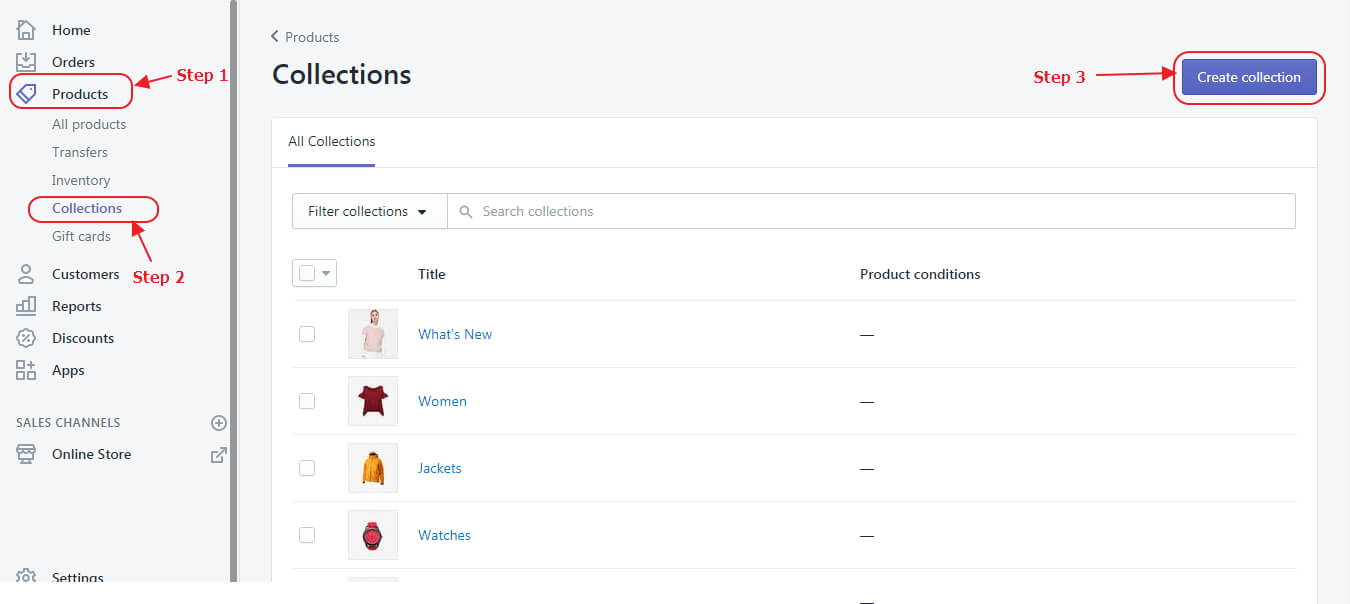
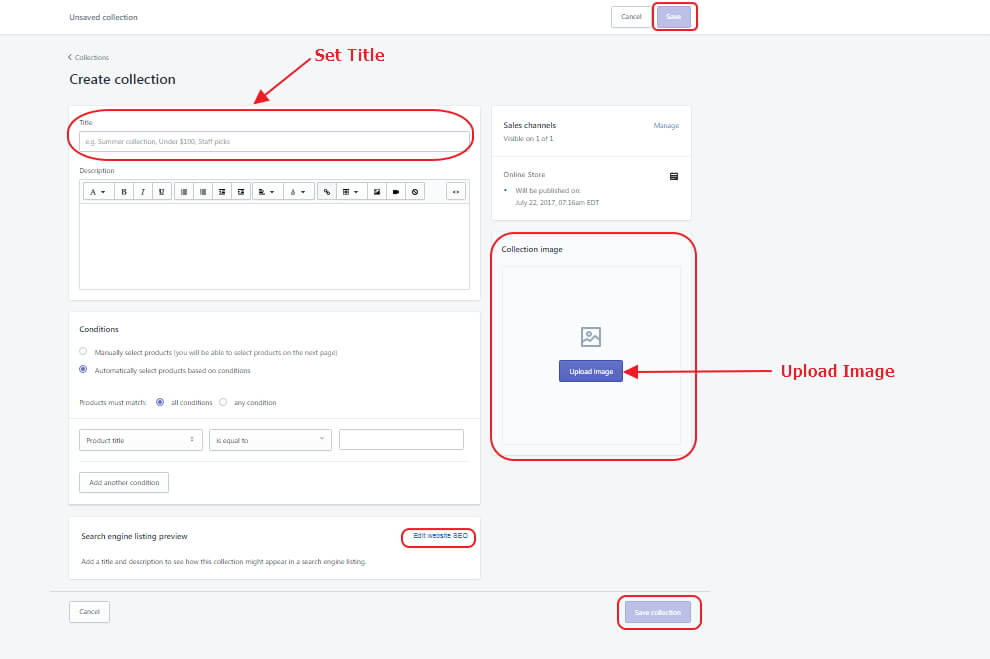
  • 4Set Title,Description and Upload Image.

Now you can customize below
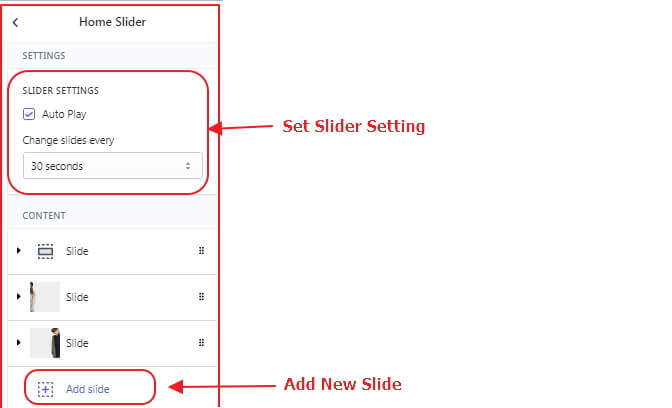
  • 1Set Slider Setting,Add New Slide and Theme Color .

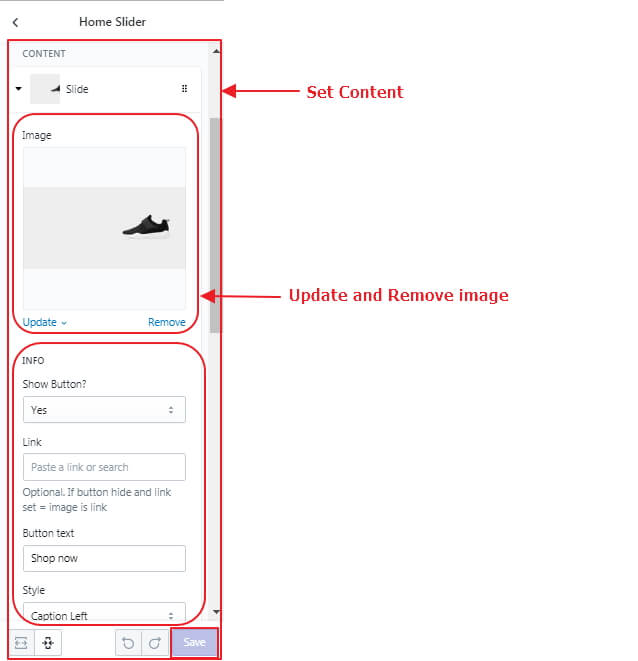
  • 2Set Image and Content .

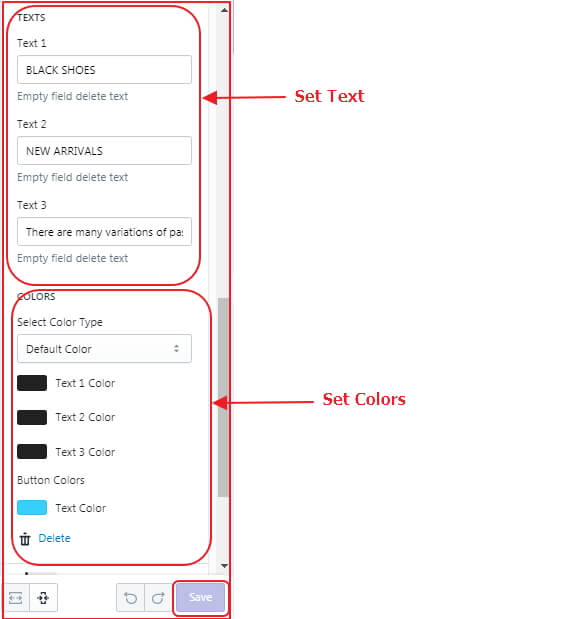
  • 3Set Text and Colors.
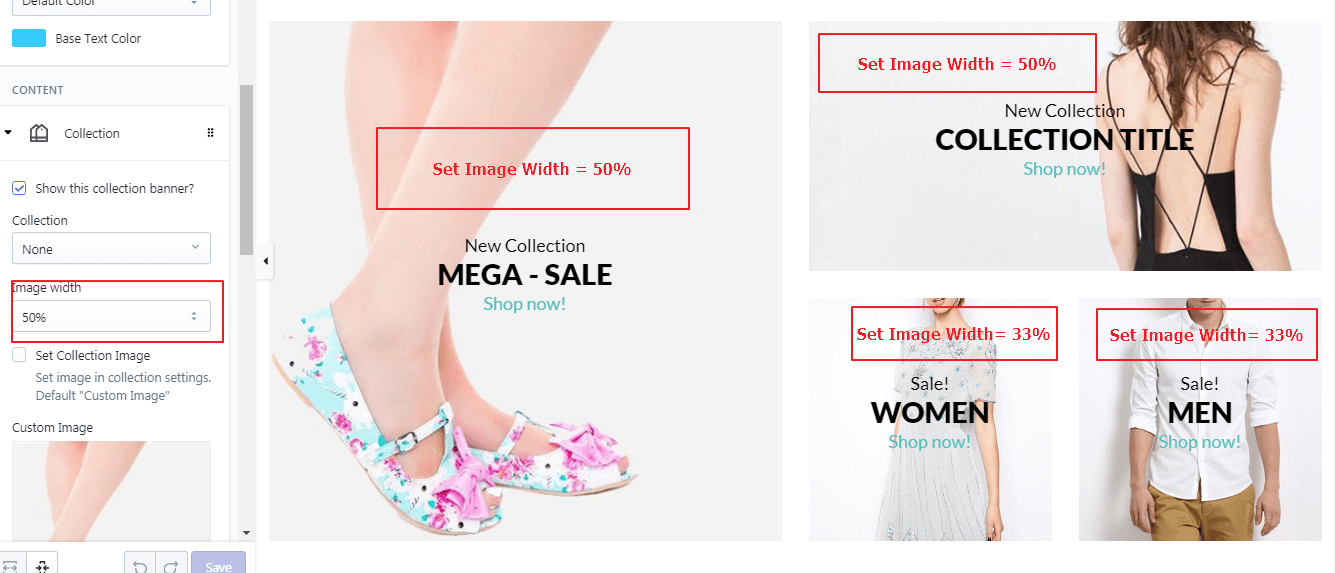
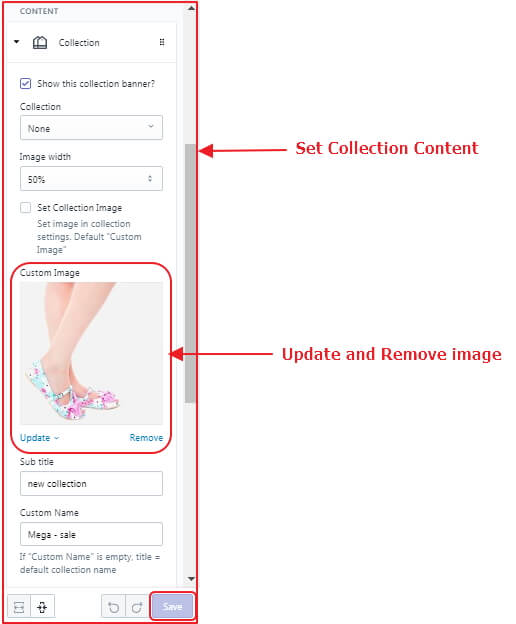
  • 1Set Image Width 50%,33%.

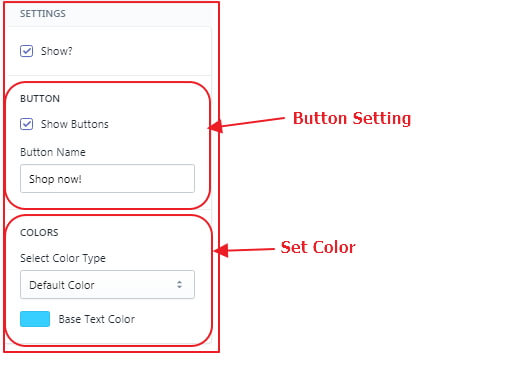
  • 2Button Setting and Set Color.

  • 3Set Collection Content and Update and Remove image.

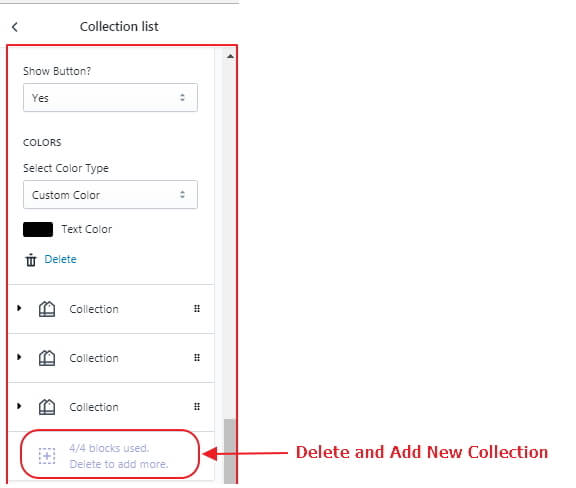
  • 4Add New Collection and Delete and Collection General Setting.

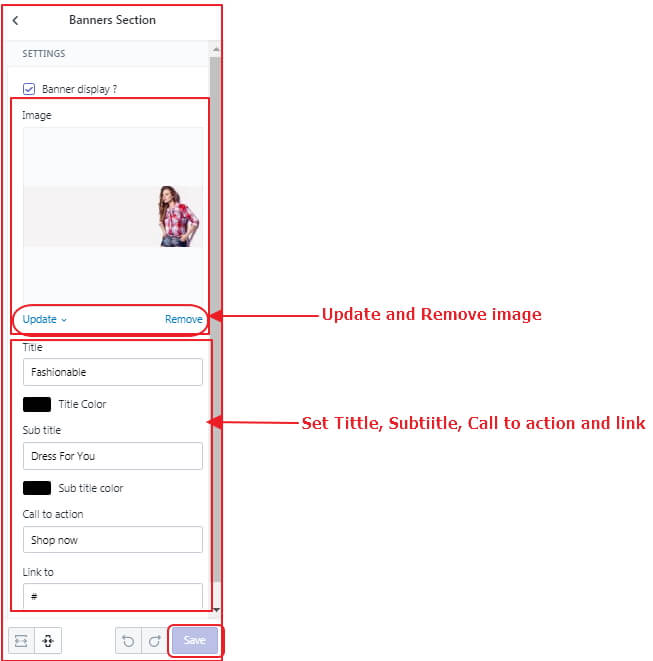
  • 1Set Image, Tittle, Subtiitle, Call to action and link.
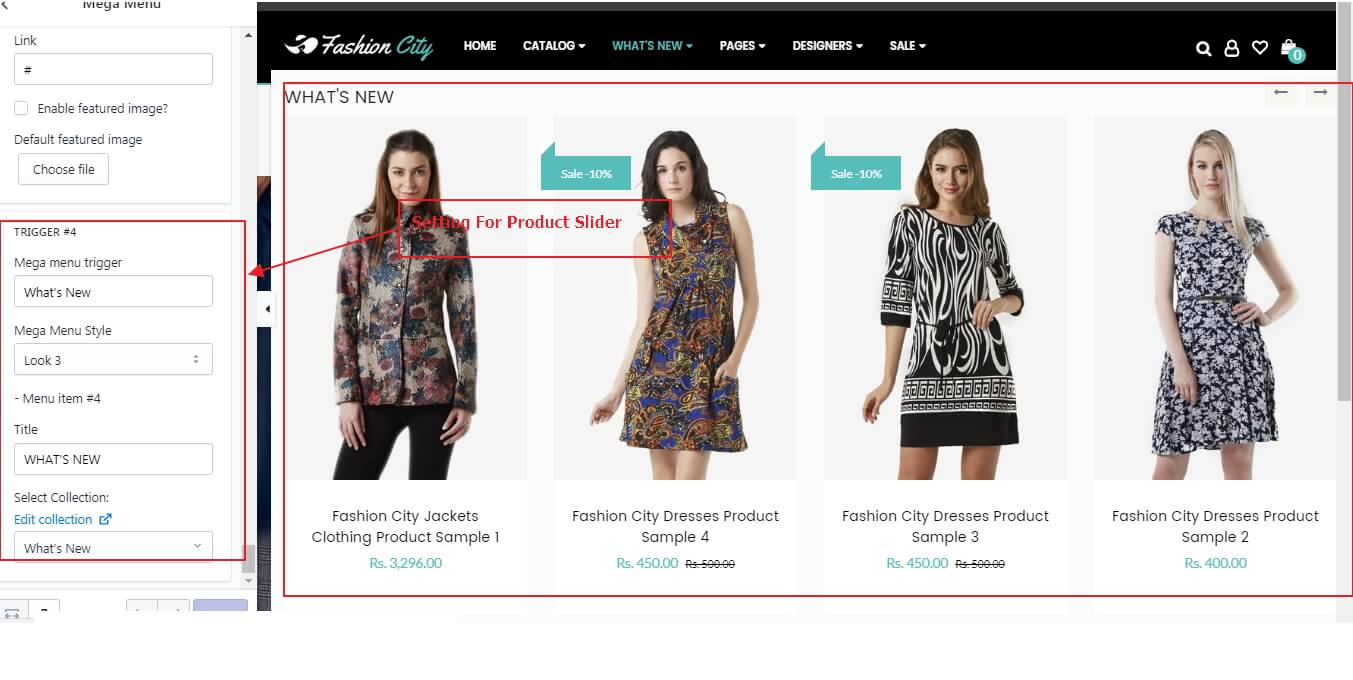
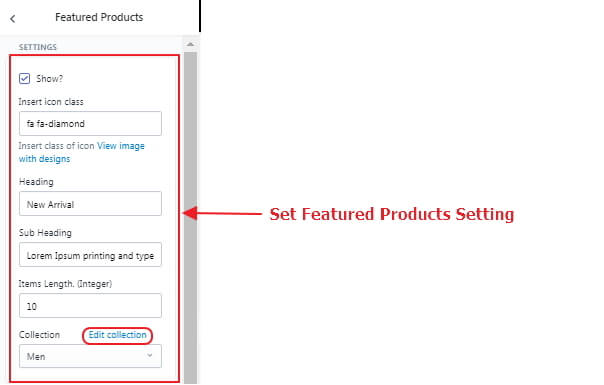
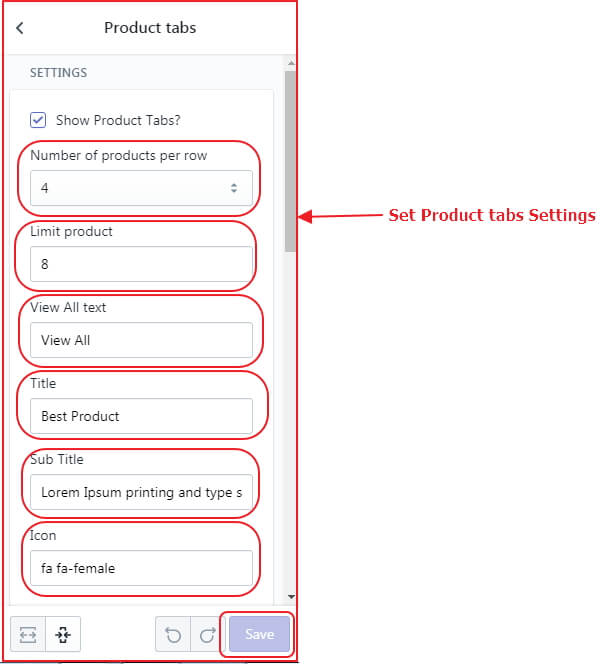
  • 1Set Product tabs Settings.

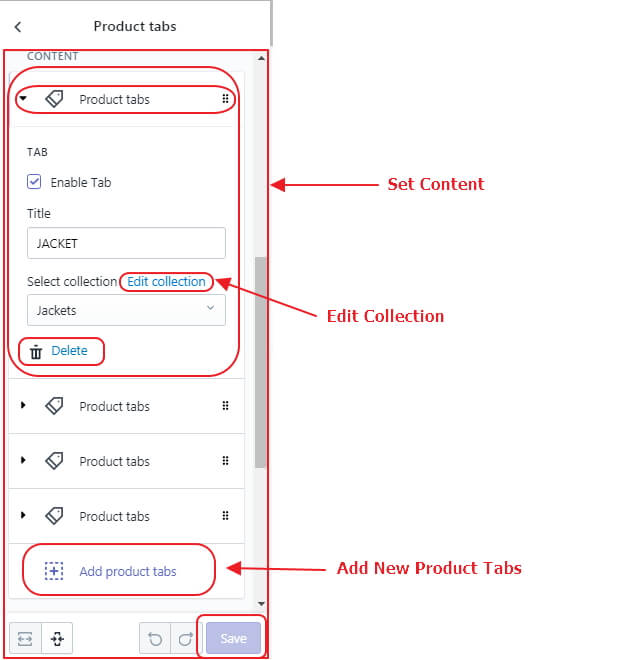
  • 2Set Content, Edit Collection and Add New Product Tabs .

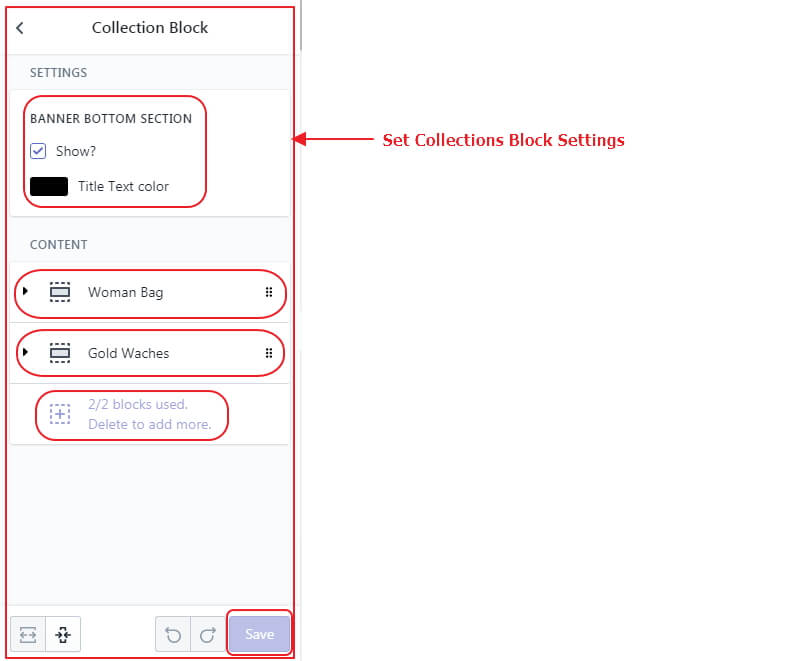
  • 1Set Collection Block Settings.

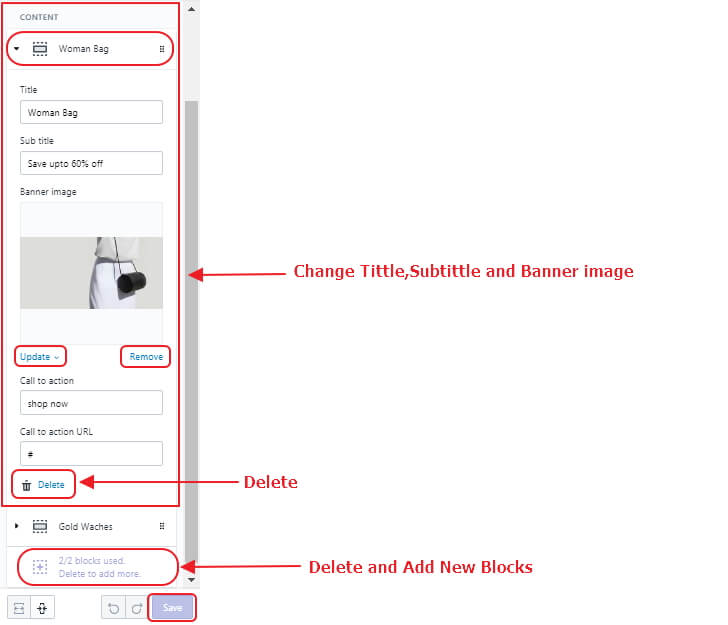
  • 2Change Tittle,Subtittle,Banner image and Delete and Add New Blocks.

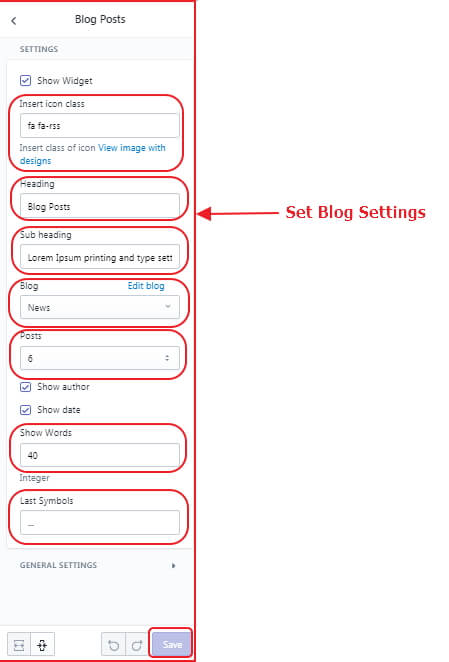
  • 1Set Blog Settings.

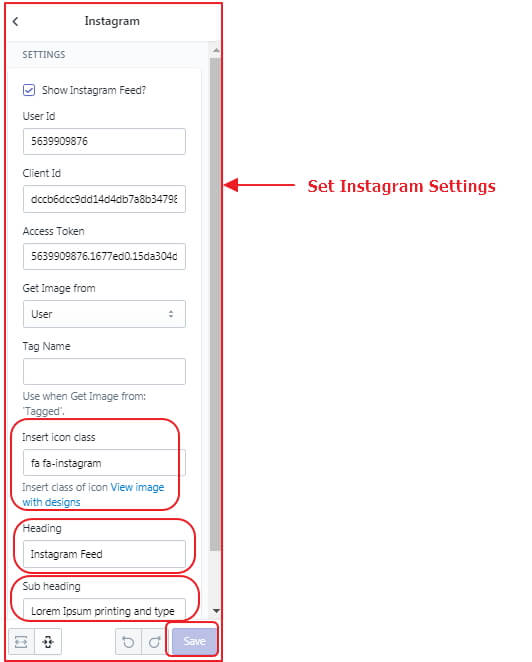
  • 1Set Instagram Setting.